3D Facial modeling and topology is something that has always caught my attention. I like to focus on the artistic point of view, including the interpretation of shapes and volumes, but also work hard to describe a concrete volume with the kind of topology that will make it possible to maximize the deformation and flexibility that the animators may desire. Is for all these reasons I decided to create this 3D Facial Modeling Timelapse.
This side of our work is something that has lost relevance in the learning curves of new modelers, since the massive implementation of sculpting software has allowed them to focus on the artistic side and avoid all of the headaches that topology might bring to volumes and, ultimately, to model deformations. Of course, focusing on shapes and volumes allows us to quickly improve our model and to obtain quality results quickly, but we have to assume that, if it isn’t a production model, we will probably not retopologize it, so we’re always going to avoid topology.
Those are the reasons that pushed me to start this 3D Facial Modeling Timelapse. I see it as a kind of topological library that I hope will be useful for those modelers who are looking for facial topology references and who are also interested in taking a general look at the entire process of completing a cartoon head ready for animation.
I usually work with Maya, but all of the steps and methods showed on this 3D Facial Modeling Timelapse are the same ones you’ll find in other packages, such as split, insertEdgeLoop, extrude, merge, sculpt, etc., so you shouldn’t have any trouble following the videos.
In order to properly follow this 3D Facial Modeling Timelapse you can download this model for FREE here. So let’s get started!.
Part 1 – Blocking Topology
I like to start modeling from a cube instead of from any other kind of primitive to avoid unnecessary poles and extra divisions at the beginning. With a 2x2x2-resolution cube, it is very easy to separate the upper & lower; front & back parts of the head, and with just a few extrusions and divisions, to get all of the main areas of the face, such as the jaw, neck, nasolabial area, brow and eye socket areas, ears, etc.
I always model my characters with their lips and eyelids closed, as this will let me keep the same number of divisions coming from the upper lip/eyelid to the lower. Later it will make the labor of shape modeling or facial rigging easier because each part will begin its movement from the same initial point.
Blocking Topology: The goals at this point are to define the character’s overall volume and to make the main topological areas ready to add more topology in the next step or to send it to our sculpting software.
During this first modeling pass, I like to leave the eyelid area not 100% defined, as far as topology. The main goal in this area at this point is to collect all the loops coming from the surrounding areas, letting them flow to their homologues. This method guarantees the continuity of the topology through the area, and will let me decide in the future what kind of solution I will use to finish this area, a standard eyelid solution or a Pixar eyelid solution. In the future I will try to cover this topic in another article from the point of view of shape modeling.
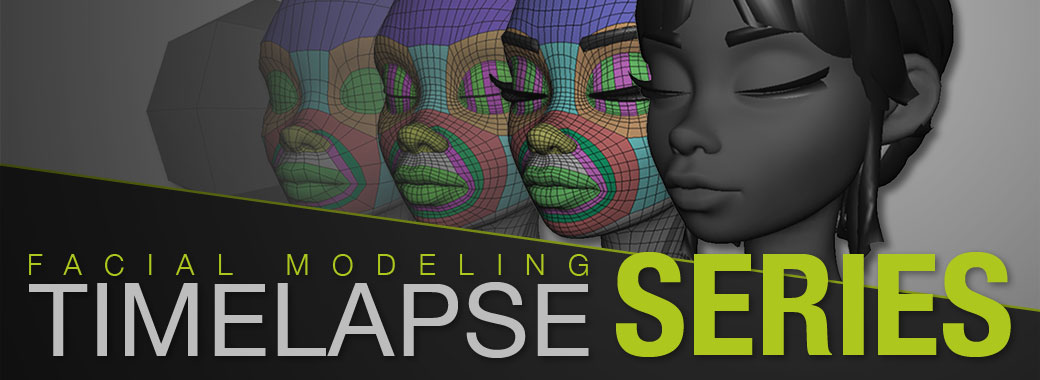
Finally, I like to colorize the different topological main areas of the face to improve their visualization for future work. Also, you may notice that I have tried to put all of the pole vertices (vertices which connect more than 4 edges) on the same edge ring surrounding each main area. This topology organization allows me, if necessary, to reuse these areas coming from the different characters that I have modeled with the same topology organization.
0:02 – Extrusion that sets the primitive topology of the jaw.
0:15 – Extrusion that sets the initial edge loops around the nasolabial area.
0:18 – Division that separates the nose area from the nasolabial area.
0:20 – Extrusion that sets primitive edge loops around the eyelid area.
0:21 – Divisions that set the mouth area & create the pole over the mouth.
0:22 – Establishing the edge loop that defines the nasolabial fold.
0:42 – Divisions that add detail to the nose area & create the nasal ala.
0:44 – Division that defines the fold between the upper & lower lip area.
1:03 – Setting all the loops to enable classical or Pixar eyelids topology.
1:07 – Divisions to allow the loops from nasolabial fold to flow over the nasal ala.
1:25 – Divisions to allow smooth transition between jaw & neck.
1:30 – Extrusions & divisions to define the clavicle and the chest area.
1:40 – Extrusion & deleted faces to set the loops around the ear area.
1:41 – Diagonal split & extrusion of faces to start blocking the ear.
1:44 – Splitting & some redirect loops to set ear back face.
1:53 – Extrusion to set the primitive edge loops around front ear face.
2:08 – Splitting & some redirect loops to set the sternal notch.
2:16 – Some point adjustments over the whole face.
2:40 – Some color variations to allow easy area topology recognition.
Part 2 – Final Topology
It’s time to move from the rough to the final topology model with all of the information required for future facial deformations, such as Blend Shapes or facial rig. As I mentioned in the beginning, this process could be done using any digital sculpting application and leaving retopo for later. However, with this example I prefer to add all of this topology by hand and, at the same time, to keep the focus on volume so as to make it more obvious where more detail is needed. In another article at some point in the future, I would like to talk more in-depth about topology, the main areas of facial topology, and the relationship of these with facial deformation, so I think it could be useful to add all of this detail showing the color scheme that differentiates the distinct main areas of topology.
Final Topology: Added all required topology to achieve nice, fleshy, sliding skin, as well as wrinkles & folds for the character’s future expressions and facial deformations.
Very often I work on the eyelid area as a separate low-resolution piece due to the amount of density required. I usually work with half of the final resolution required in this area, so before I attach this piece to the rest of the head, I apply a mesh smooth operation to get the full density required on the mesh to match with the loops coming from the surrounding areas.
One of the areas to which I apply the most changes during this episode is the neck area, where topology varies from a simple cylinder to a reorganized mesh in order to achieve rich and believable neck deformations where the sternocleidomastoid and trapezius muscles should appear. This work may not be necessary with stylized characters, but in this case, given the proportions and details of the design, all this new neck topology is going to be very useful to give the character added appeal.
0:10 – Extend the edgeLoops coming from the lips to the nasolabial area.
0:20 – Bevel added-on lip contour to create a crease area.
0:21 – Face extrusions to create the philtrum.
0:37 – Extend the edgeLoops coming from the nasolabial area to the jaw.
0:39 – Divisions to round out the jaw area.
0:43 – Adding divisions surrounding the entire nasolabial area.
0:46 – Adding divisions to create the creases in the nasolabial fold.
0:46 – Adding divisions across the nasolabial area.
0:47 – Tweaking volumes on the nasolabial area.
1:07 – Adding divisions across the forehead area.
1:19 – Deleting temp eyelids and adding new eyeball.
1:28 – Beginning creation of eyelids from a different low-resolution piece.
1:30 – Applying a smooth to eyelids to match the divisions on the eye socket area.
1:47 – Extending edge loops coming from the cheek area to the eye socket..
1:59 – Creating a division from the upper eyelid to the lower eyelid.
2:01 – Extruding the upper eyelid faces to make them a little bit thicker.
2:05 – Adding an extra division on both eyelids.
2:10 – Adding loops on the surrounding area to match divisions.
2:25 – Extending the edge loops coming from the forehead area to the scalp.
2:28 – Using sculpt to relax the entire scalp area.
2:44 – Adding divisions on the area surrounding the eyelids.
2:45 – Reordering the mesh to draw the neck muscles.
3:03 – Adding divisions on the ears to match the scalp divisions.
3:20 – Using sculpt to relax the entire scalp area.
3:37 – Adding divisions to add detail to the ears.
4:16 – Final retouches to the topology.
Part 3 – Final Modeling
As you know, this is a kind of mesh created for animation which needs to have all necessary topology to get nice facial deformations, so the high density of mesh on the model could be a headache when attempting to maintain clean and smooth shapes. Due to all of this, the final modeling is probably the step that is going to take the most time, by far, when compared with the other two steps, as this last step involves the artistic side of the work while at the same time requiring that you continue to pay attention to the flow of the final mesh.
During this process I usually do a lot of work with deformers such as lattice, soft selections, and Sculpt Geometry Tool, as well as deformations on the mesh using direct vertex manipulation in normal mode. All of these tools let me focus on the volumes and shapes, and if necessary, they allow me to modify the mesh at the vertex level to fix or improve the flow of the topology.
Final Modeling: Wax on, right hand. Wax off, left hand. Wax on, wax off. Breathe in through the nose, and out through mouth. Wax on, wax off…
All of the elements of the face, such as eyelashes or brows, should have the same topology structure as the surface behind them in order to get nice deformations coming from the face rig without any extra work. So a good time to make them is when you have finished all of the rest of the work on the face. This means that you have an easy way to extract those elements from the mesh of the head, keeping the same amount of divisions. Finally, hair modeling is something that is hugely dependent on the production workflow, because it could be as easy as polygon hair, flat cards with hair painted with color and opacity, or just real hair. My choice in this case was a technique that will let me decide in the future if I prefer to paint textures or to use all of those curves as a guide for a real hair solution. With this technique, I’ll only need to create different NURBS surface levels over the whole head. All of these layers are made using three NURBS curves groups to create a loft surface between them. This method allows me direct control over the hair surfaces with just manipulation of the curve CVs.
1:16 – Converting the selection from edges to curves to build the eyelashes.
1:17 – Creating eyelashes with loft surfaces using the extracted curves.
1:22 – Creating brows from the head mesh and deleting unused faces.
1:28 – Creating curves to create loft surfaces for hair representation.
3:52 – Final retouches to the volumes & shapes of the faces.
That’s all for now, but as I mentioned in the beginning, all of those methods can be done using any 3D software and using other topological solutions. Those are just the kinds of solutions that I feel comfortable with and which give me the kind of deformation results I’m looking for.
I hope you’ve found my 3D Facial Modeling Timelapse useful, and remember you can download this model for FREE following the link below. Also, if you have any questions or comments, please feel free to leave a reply.
Thanks!
GET YOUR ASSET HERE: https://gum.co/GtIHj
super awesome thank you! I learned a lot from this. Do you think there any advantages of using this workflow over working out the form in brush and then making it a live object in maya and drawing out the topology? Isn’t doing both at once faster in the end?
Thanks for your words!. It’s true, do the sculpting and leave topology for later could be faster than do all of this at same time, but I always prefer to go to zBrush with solid base mesh topology.
Good topology is always going to increase efficiency inside zBrush, at least for me, especially when I’m using masks. So the Part1 could be a good reference for those who want to go to zBrush with a base mesh before to start with the sculpting process.
By the other hand, zBrush isn’t always on the pipeline, so these videos still are a solid reference for those cases.
That’s really great to know, thank you! I’m an aspiring modeler myself and to be honest, I’m of the same opinion as well. I actually really enjoy polygon modeling and the challenge of thinking of topology and form at once, even a bit more than sculpting the whole char ate then retopologizing haha! Your style of utilizing Maya’s built in “sculpting-esque” type brushes and tools is really inspiring. I was afraid for a moment that sculpting *first* was the “new way” and that it had replaced poly modeling. After all, to quickly concept I prefer to draw on paper then follow your concept. Thanks so much, I’ve been watching your tutorials almost exclusively for the past few days trying my very best to follow your technique. Practice Practice Practice! Best of luck at Disney, you’re living the dream!
On the other hand, zBrush has become an important tool to me to finalize characters with densed topologies because I can spend some hours cleaning stretched areas with the smooth brushes, and recovering at the same time the lost volume.
I’m glad you found all these videos useful for your learning process 😉
Hello Sergi,
I’m always on the lookout for great topology examples and I first studied your work years ago when I found a few precious images of your fantastic Asian boy character. I’ve studied every vertex and pole! Being mainly self taught, his is immensely helpful to me. Thank you for sharing your knowledge. You are a Great Master and generous too!
I also prefer to first poly model in Maya before to going into Zbrush. I find I have more control in Zbrush over the volumes and contours with a well ordered, simple topology. And certainly, a nice topo can be reused and adapted to many different characters with less effort than starting from scratch. And then the added benefit of no retopo after.
The new Maya 2016 sculpting tools will hopefully be very helpful to this workflow.
Thanks again!
Hi Chris,
thanks for your words! I’m so glad all this stuff has become useful to others! The Asian boy is so old work… 2007 if I’m not wrong…
I can’t wait to put my hands on the new Maya 2016, but I’m not sure if this will cover all the advantages I have right now with the zBrush on my pipeline. Probably not yet on this version, but I think Autodesk did a smart movement merging Mudbox’s brushes into Maya.
Let’s see what the future brings to us! 😉
Hola Sergi,
M’agradaria saber si aquest “3D Facial Modeling Timelapse” també el tens fet en forma de tutorial en video pas a pas. Si és així, saps com ho puc aconseguir?.
Salutacions.
Hola Marco,
no aquest tutorial només està disponible d’aquesta manera, és a dir, tipus article explicatiu dels tres capítols del timelapse.
Merci per l’interès! 😉
HI! This is modeling is awesome! Thank you for existing and sharing this gold!
Can I ask you something? I’m not sure why did you model eyelid with depth, you extrude it then you shape it in place. Is there specific reason for that? I’m trying to follow slowly step by step, but I don’t understand that one.. as well as chin, I don’t know how topology should look underneath chin.
Thank you!
Regards, M
Hi again,
I bought this 3D Facial Modeling Timelapse and have some issues with downloading files from gumroad, when i click on download it send me on a “No page found The thing you were looking for doesn’t exist!” can you help me please.
Thanks
Katia M.
Hi Katia,
were you able to download the files? I’ve just checked on my end and it seems everything is fine so you should be able to download everything without any issue. Please let me know how it goes.
Thank you,
Sergi
Hello, this is a helpful video. Did you only use Maya topology, or did you use an add-on?
I really liked the method you are doing head modelling, I do it by sculpting and retopology, but now I realized your method is so beneficial, I would love to try this, I hope this will help me. Thanks 😊